Deleted
Deleted Member
Posts: 0
|
Post by Deleted on Jan 1, 2012 18:53:49 GMT -5
No problem, Also I will re-install the oil fill pipe with the closed cap. What I was trying to say is my 67 high performance 455 is performing as it should no issues with blow by, compression problems etc.
|
|
Deleted
Deleted Member
Posts: 0
|
Post by Deleted on Jan 1, 2012 19:13:00 GMT -5
Okay  I re-read the thread there is merit to this conversion and I thank you all. I am ( 400E) going to keep the old style dual snorkel breather, oil style oil fill pipe with breather cap. I will remove the PVC system and install a closed valve cover. When I build 'the the 425 I am going to use the set up I have on the 455.  Done, what's next? |
|
Deleted
Deleted Member
Posts: 0
|
Post by Deleted on Jan 1, 2012 19:19:11 GMT -5
Well, not ya got my interest and only because I want to do it right. The 1st system issue you address (california/michigan) you say wont perform as designed. What would you do to that specific setup to make it work properly ? I set my cutlass up similar to this setup. The only differance is that I didnt put a check valve, im on the drivers side and running off the front carb vacuum. So the setup is a pvc valve in the valve cover running to the front vacumm on the carb with an oil tube open style cap. Thanks Post. If you`ll notice on the now "named" Michigan/ California example, there is a check valve in the passenger valve cover, no vacuum hose installed, pressure hose routed to unfiltered air. Drivers valve cover gets a PCV valve of unknown values. Oil filler tube gets a "breather" style cap. Oil dip-stick as near as I can tell is sealed type for PCV system. A PCV system needs a sealed block, a pcv valve located on the furthest point on one side of the block(usually a valve cover) and a FILTERED air supply on the opposite side. EVERYTHING else ie. filler tube, oil dip stick, gaskets seals etc. all get special attention to sealing. The way you check your system is simple, to determine if your pulling enough vacuum to keep you engine clean is to firstrun your engine to operating temp, make sure your dip-stick, oil filler cap, pcv vacuum hose and grommet in valve cover are all in good shape, now remove the fresh air filter (or hose routed to a filter)) from the rubber grommet in the valve cover, plug this grommet with a tight fitting plastic plug, remove dip-stick and install vacuum gauge hose OVER the dip-stick tube (you`ll probably need a vacuum line adapter) start your engine leave at idle, you`ll need 3" to 5" of vacuum for correct performance. If your running 0" of vacuum you`ve obviously got a leak somewhere and your not vacuuming out your crankcase. The leak can be a seal, gaskets, missing or cracked "O" ring on the distributor, many things. If you get a pressure reading you have crankcase pressure and will experience leaks, premature seal failure. The 5" is a high mark and takes close attention to engine assembly, any vacuum reading below this is acceptable. If you get 2 to 3" your doing really good. Hope this makes some sense, to someone other than me! |
|
|
|
Post by RAM Z on Jan 1, 2012 19:51:54 GMT -5
What exactly is this Michigan/California example? Because they are two different systems.  The pic on the left is the non California flapper valve, this is used with the breather oil cap and sealed drivers side rocker cover. The middle is the California breather, used with the top hat oil cap and PCV valve in drivers side rocker cover. This is the closed system. All fumes/air/etc are circulated back in the engine. It even called that on the window sticker of the cars sold in California. I really dont get what you are talking about because in the above post you describe Robskis 67 to a T. But you say its not right in post #152. Were you referring to the engine in his 64? |
|
|
|
Post by keener on Jan 1, 2012 19:56:24 GMT -5
Okay I re-read the thread there is merit to this conversion and I thank you all. I am ( 400E) going to keep the old style dual snorkel breather, oil style oil fill pipe with breather cap. I will remove the PVC system and install a closed valve cover. When I build 'the the 425 I am going to use the set up I have on the 455. Done, what's next? Robski: If you remove the PCV valve from the valve cover and plug the hole you will need to change the type of black valve you are using in the other cover(the one connecting to the snorkle). It needs to be the type that has a vacuum line running from the valve to the carb or intake. Without this vacuum, the system will not purge crank case gas. The breather pipe still connects to the aircleaner as you mentioned. Postcar: now I realize you were talking about the 400 the whole time......my bad, I thought the later comments were directed at the system he was using on the 455. |
|
|
|
Post by keener on Jan 1, 2012 20:01:09 GMT -5
Robski: Jasen just posted some pics of the different valves. If you remove the PCV valve from the 400, you will need to install a valve like the one in the left picture.
|
|
|
|
Post by RAM Z on Jan 1, 2012 20:12:49 GMT -5
He already has the right flapper valve. All he has to do is remove the PCV and install a closed rocker cover.
|
|
Deleted
Deleted Member
Posts: 0
|
Post by Deleted on Jan 1, 2012 20:21:05 GMT -5
What exactly is this Michigan/California example? Because they are two different systems. The pic on the left is the non California flapper valve, this is used with the breather oil cap and sealed drivers side rocker cover. The middle is the California breather, used with the top hat oil cap and PCV valve in drivers side rocker cover. This is the closed system. All fumes/air/etc are circulated back in the engine. It even called that on the window sticker of the cars sold in California. I really dont get what you are talking about because in the above post you describe Robskis 67 to a T. But you say its not right in post #152. Were you referring to the engine in his 64? What I`m saying in #152 is first, the terminology is incorrect. With a pcv valve in the drivers valve cover, the passenger valve cover would use an air filter, not a breather. He referred to it as a breather that would expel blow by that the pcv valve couldn`t handle, in that scenario the pcv system becomes inoperable and needs attention. The michigan/ california name came up to identify the 400 in his 64 that has a little michigan and a little california venting going on, making them both inoperable. Thanks for the pics, but I have a general idea how they work  |
|
|
|
Post by bubbasz1 on Jan 1, 2012 20:42:19 GMT -5
Well, not ya got my interest and only because I want to do it right. The 1st system issue you address (california/michigan) you say wont perform as designed. What would you do to that specific setup to make it work properly ? I set my cutlass up similar to this setup. The only differance is that I didnt put a check valve, im on the drivers side and running off the front carb vacuum. So the setup is a pvc valve in the valve cover running to the front vacumm on the carb with an oil tube open style cap. Thanks Post. If you`ll notice on the now "named" Michigan/ California example, there is a check valve in the passenger valve cover, no vacuum hose installed, pressure hose routed to unfiltered air. Drivers valve cover gets a PCV valve of unknown values. Oil filler tube gets a "breather" style cap. Oil dip-stick as near as I can tell is sealed type for PCV system. A PCV system needs a sealed block, a pcv valve located on the furthest point on one side of the block(usually a valve cover) and a FILTERED air supply on the opposite side. EVERYTHING else ie. filler tube, oil dip stick, gaskets seals etc. all get special attention to sealing. The way you check your system is simple, to determine if your pulling enough vacuum to keep you engine clean is to firstrun your engine to operating temp, make sure your dip-stick, oil filler cap, pcv vacuum hose and grommet in valve cover are all in good shape, now remove the fresh air filter (or hose routed to a filter)) from the rubber grommet in the valve cover, plug this grommet with a tight fitting plastic plug, remove dip-stick and install vacuum gauge hose OVER the dip-stick tube (you`ll probably need a vacuum line adapter) start your engine leave at idle, you`ll need 3" to 5" of vacuum for correct performance. If your running 0" of vacuum you`ve obviously got a leak somewhere and your not vacuuming out your crankcase. The leak can be a seal, gaskets, missing or cracked "O" ring on the distributor, many things. If you get a pressure reading you have crankcase pressure and will experience leaks, premature seal failure. The 5" is a high mark and takes close attention to engine assembly, any vacuum reading below this is acceptable. If you get 2 to 3" your doing really good. Hope this makes some sense, to someone other than me! Good information Mike, never heard of checking the vacuum at the oil dip stick tube, makes perfect sense, probably will have to figure out a way to seal the top hat a little better to get it to operate like it should, now I just have to remember to do this when I can get the car out in a few months.  |
|
|
|
Post by keener on Jan 1, 2012 21:15:46 GMT -5
He already has the right flapper valve. All he has to do is remove the PCV and install a closed rocker cover. From the photo the otherside is not visible, so I assumed it did not have the male end for connecting a vacuum line. However, after going back several pages in this thread, I found a photo that does show the male connection. I thought AC Delco made them both ways (with and without) but they had different part numbers. Did I dream this up? As far as the reading when checking the vacuum, Postcar is right, I have always been told 1-3. A positive pressure reading means there is a leak somewhere. A large value most often points to an inadequate seal around the intake. You could spend a lot of time chasing down the problem. So, like postcar said, best to pay close attention when assemblying the engine. |
|
Deleted
Deleted Member
Posts: 0
|
Post by Deleted on Jan 2, 2012 9:10:37 GMT -5
I'm running a QJet where would be the best place to fit the vacuum line for the flapper valve?
|
|
|
|
Post by keener on Jan 3, 2012 10:24:02 GMT -5
if you have no available port on the back of the carb, either hook it to the intake or I have seen people use a splitter on a hose already coming off the intake. The latter option may not be the most ideal, but if you have no available places on the intake and carb, you are left with that option. Would be rare though, as the intake typically has extra plugs.
|
|
Deleted
Deleted Member
Posts: 0
|
Post by Deleted on Jan 3, 2012 10:31:03 GMT -5
Sorry I would I meant was, there are areas on the carb that have ports I did not know if one made any difference or not in terms of vacuum pull for the flapper?
|
|
Deleted
Deleted Member
Posts: 0
|
Post by Deleted on Jan 3, 2012 14:10:38 GMT -5
There`s a few things to keep in mind. First, the vacuum should come non-ported from the carb base using the smallest fitting available. This is an open ended circuit, so don`t tee anything in with it. The vacuum has nothing to do with controlling the flapper in the valve, it merely vacuums the crankcase at idle. Above idle crankcase pressure builds unseating the flapper, and along with a slight vacuum formed across the grommet in the air cleaner inlet, exhaust gasses are drawn out of the crankcase and in to the carb (these engineers must have been on drugs). The vacuum line going to the check valve could best be described as a lame attempt at pollution control. Remember this is when pollution control was first being taken seriously. The vacuum line to the valve is a vacuum LEAK, plain and simple, keep it as small as possible. Keep your check valve clean, your breather clean, and it will "kinda" work (they didn`t do much when new) Don`t install to a fitting positioned over a runner, or between two runners, always to the carb base below the plates.
|
|
|
|
Post by keener on Jan 3, 2012 21:41:39 GMT -5
There`s a few things to keep in mind. First, the vacuum should come non-ported from the carb base using the smallest fitting available. This is an open ended circuit, so don`t tee anything in with it. The vacuum has nothing to do with controlling the flapper in the valve, it merely vacuums the crankcase at idle. Above idle crankcase pressure builds unseating the flapper, and along with a slight vacuum formed across the grommet in the air cleaner inlet, exhaust gasses are drawn out of the crankcase and in to the carb (these engineers must have been on drugs). The vacuum line going to the check valve could best be described as a lame attempt at pollution control. Remember this is when pollution control was first being taken seriously. The vacuum line to the valve is a vacuum LEAK, plain and simple, keep it as small as possible. Keep your check valve clean, your breather clean, and it will "kinda" work (they didn`t do much when new) Don`t install to a fitting positioned over a runner, or between two runners, always to the carb base below the plates. VERY well stated!! |
|
Deleted
Deleted Member
Posts: 0
|
Post by Deleted on Jan 24, 2012 17:58:16 GMT -5
|
|
Deleted
Deleted Member
Posts: 0
|
Post by Deleted on Jan 24, 2012 18:16:29 GMT -5
I also wanted to mention that fellow Club member real57vetteguy-Mark fabbed that A/C bracket that will hold a Sanden A/C compressor.
|
|
|
|
Post by real57vetteguy on Jan 24, 2012 19:28:02 GMT -5
Rob,
Looking GOOD. I have the same wire loom kit as you and mongoose, I am thinking of making a extra loom to keep the wires neat looking going to the dist
|
|
Deleted
Deleted Member
Posts: 0
|
Post by Deleted on Jan 24, 2012 19:40:13 GMT -5
Mark let me know how that turns out. Also I forgot to mention that POSTCAR helped alot too with the "crankcase ventilation fix" I appreciate everyone's input.
|
|
|
|
Post by realfast65 on Jan 25, 2012 8:47:03 GMT -5
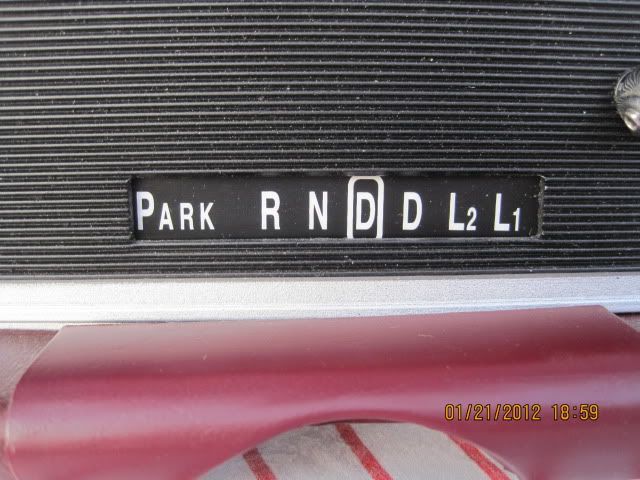
Where did you get the gear indicator lens with the OD numbers for your dash? I want one!
|
|

 I re-read the thread there is merit to this conversion and I thank you all. I am ( 400E) going to keep the old style dual snorkel breather, oil style oil fill pipe with breather cap. I will remove the PVC system and install a closed valve cover. When I build 'the the 425 I am going to use the set up I have on the 455.
  Done, what's next?


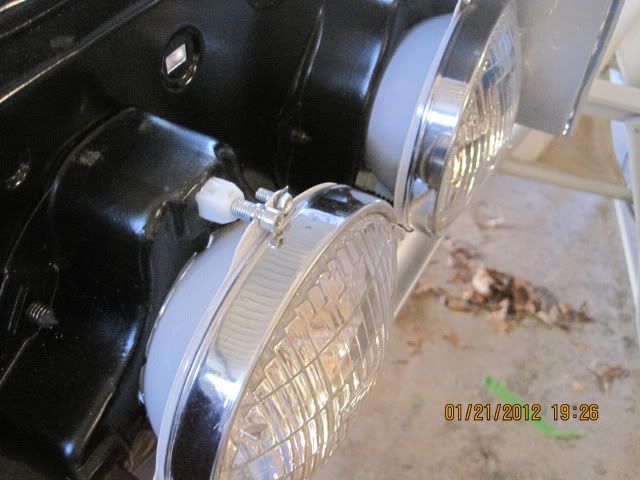
 Then I will order a shrouded flex lite dual fan. Pick the correct alternator. Here are some more detail pictures including bending the trans lines, work on the dash,what Keener was kind enough to walk me through the proper crankcase ventilation set up,core support work etc.